5 Easy Cycling Routes for Beginners on the West Coast
Here's the updated outline and the article content, following all your specifications:Exploring the West Coast on two wheels is an incredible experience. Whether you're a seasoned cyclist or just starting out, finding the perfect route can make all the difference. This article delves into a fantastic cycling route along the West Coast, highlighting its key features, offering gear recommendations, and comparing different product options to help you make the most of your cycling adventure. Get ready to discover breathtaking scenery and unforgettable moments on this amazing ride!
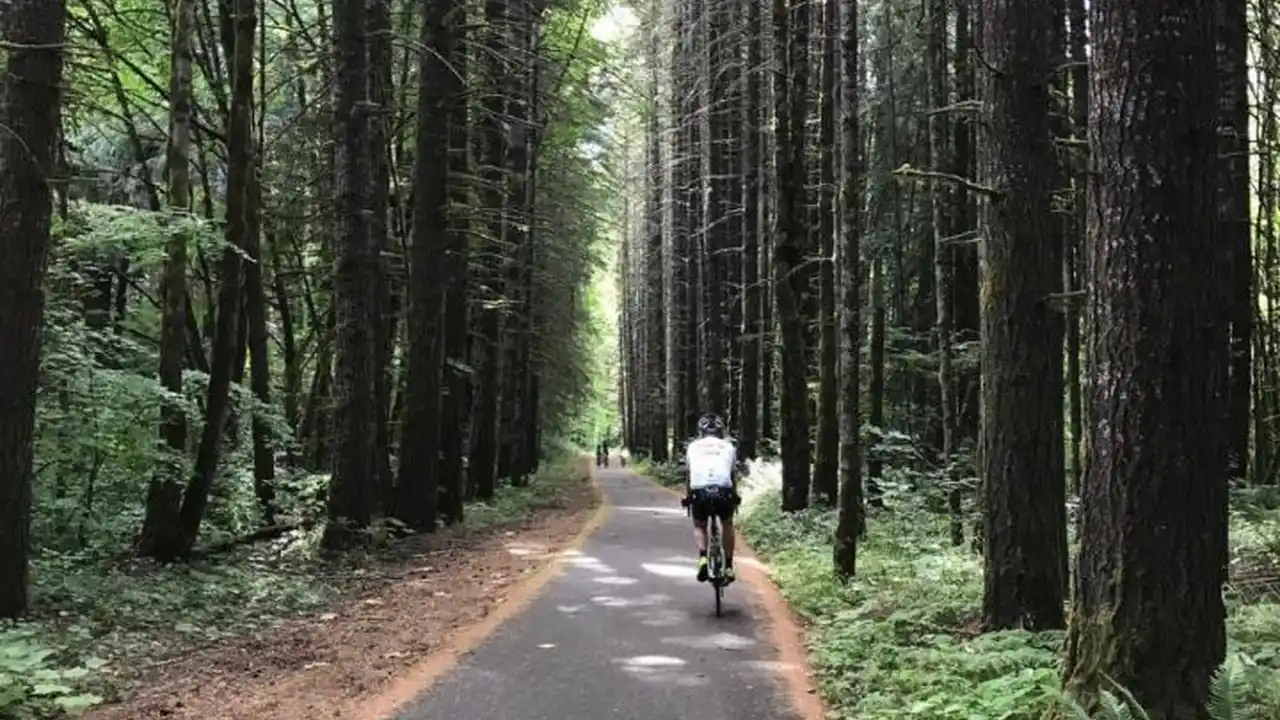
The Pacific Coast Highway (PCH), also known as Highway 1, offers some of the most stunning cycling routes in the world. This iconic road stretches along the California coastline, providing cyclists with breathtaking views of the Pacific Ocean, dramatic cliffs, and charming coastal towns. This article focuses on a specific, highly recommended section of the PCH, perfect for a multi-day cycling tour.
Planning Your PCH Cycling Trip West Coast Cycling Route Planning
Before embarking on your PCH cycling adventure, careful planning is essential. Consider the following:
- Time of Year: Spring and fall offer the most pleasant weather, avoiding the summer heat and winter storms.
- Direction: Southbound is generally preferred as the prevailing winds are from the north, providing a tailwind.
- Distance and Duration: This specific section of the PCH is approximately 300 miles, typically requiring 4-6 days of cycling.
- Accommodation: Book accommodations in advance, especially during peak season. Options range from budget-friendly motels to luxurious resorts. Campsites are also available.
- Gear: Ensure your bike is in good working order. Pack essential cycling gear, including a helmet, cycling shorts, gloves, sunglasses, and a repair kit.
The Route Detailed Itinerary for Pacific Coast Highway Cycling
This itinerary focuses on a section of the PCH between Monterey and Santa Barbara, known for its stunning scenery and manageable cycling conditions. This section avoids some of the steeper climbs further north and south.
- Day 1: Monterey to Carmel-by-the-Sea (approx. 20 miles): Start in Monterey, known for its famous aquarium. Cycle south along the scenic 17-Mile Drive (note: there is a fee for cyclists) to Carmel-by-the-Sea, a charming town with art galleries and boutiques.
- Day 2: Carmel-by-the-Sea to Big Sur (approx. 30 miles): This is one of the most iconic stretches of the PCH. Enjoy breathtaking views of the Pacific Ocean and the rugged coastline. Stop at Bixby Bridge for photo opportunities. This section includes some challenging climbs.
- Day 3: Big Sur to San Simeon (approx. 50 miles): Continue south along the PCH, passing through redwood forests and coastal meadows. Visit the Hearst Castle in San Simeon, a historic landmark.
- Day 4: San Simeon to Cambria (approx. 15 miles): A shorter day of cycling allows you to explore the charming town of Cambria, known for its art galleries and antique shops. Enjoy a leisurely afternoon exploring the town and relaxing on the beach.
- Day 5: Cambria to Morro Bay (approx. 25 miles): Cycle south to Morro Bay, a picturesque harbor town with a distinctive rock formation. Enjoy fresh seafood and explore the harbor.
- Day 6: Morro Bay to Santa Barbara (approx. 160 miles): This is a longer day and could be split into two days depending on your fitness level. The route continues south along the PCH, passing through scenic coastal towns and agricultural areas. Arrive in Santa Barbara, a beautiful city with Spanish colonial architecture and stunning beaches. Consider taking the train or bus for part of this longer leg if needed.
Essential Cycling Gear for the Pacific Coast Highway Recommended Products and Comparisons
Having the right gear can significantly enhance your cycling experience. Here are some essential items and product recommendations:
Cycling Helmet Safety First Giro Agilis vs Specialized Align II
A helmet is the most important piece of safety equipment. Look for a helmet that fits well, is comfortable, and meets safety standards.
- Giro Agilis MIPS: A popular choice for its comfortable fit, excellent ventilation, and MIPS (Multi-directional Impact Protection System) technology. Price: $100-$120.
- Specialized Align II: A more budget-friendly option that still offers excellent protection and comfort. Price: $50-$60.
- Comparison: The Giro Agilis offers slightly better ventilation and MIPS technology for enhanced safety. The Specialized Align II is a great value option for those on a budget.
- Usage Scenario: Both helmets are suitable for road cycling. The Giro Agilis is a better choice for longer rides and hotter weather.
Cycling Shorts Comfort is Key Pearl Izumi vs Castelli
Cycling shorts with padding (chamois) are essential for comfort on long rides.
- Pearl Izumi Attack Cycling Shorts: Known for their comfortable fit and durable construction. Price: $80-$100.
- Castelli Endurance 3 Bibshorts: A premium option with excellent padding and compression. Price: $150-$200.
- Comparison: The Castelli Endurance 3 Bibshorts offer superior comfort and performance for serious cyclists. The Pearl Izumi Attack Cycling Shorts are a more affordable and versatile option.
- Usage Scenario: Pearl Izumi shorts are great for everyday cycling and shorter rides. Castelli bibshorts are ideal for long-distance cycling and racing.
Cycling Gloves Grip and Protection Fox Racing Dirtpaw vs Giro Bravo Gel
Gloves provide grip, cushioning, and protection in case of a fall.
- Fox Racing Dirtpaw Gloves: Durable and affordable gloves with padded palms. Price: $30-$40.
- Giro Bravo Gel Gloves: Gel-padded gloves for enhanced comfort on long rides. Price: $40-$50.
- Comparison: The Giro Bravo Gel Gloves offer superior comfort due to the gel padding. The Fox Racing Dirtpaw Gloves are a more durable option for off-road cycling.
- Usage Scenario: Giro gloves are great for road cycling, while Fox Racing gloves are suitable for mountain biking and more rugged terrain.
Cycling Sunglasses Eye Protection Oakley vs Tifosi
Sunglasses protect your eyes from the sun, wind, and debris.
- Oakley Jawbreaker Sunglasses: High-performance sunglasses with interchangeable lenses and excellent coverage. Price: $200-$250.
- Tifosi Swick Sunglasses: A more affordable option with interchangeable lenses and a comfortable fit. Price: $70-$90.
- Comparison: Oakley sunglasses offer superior lens quality and durability. Tifosi sunglasses are a great value option for those on a budget.
- Usage Scenario: Oakley sunglasses are ideal for serious cyclists who demand the best performance. Tifosi sunglasses are a great choice for recreational cyclists.
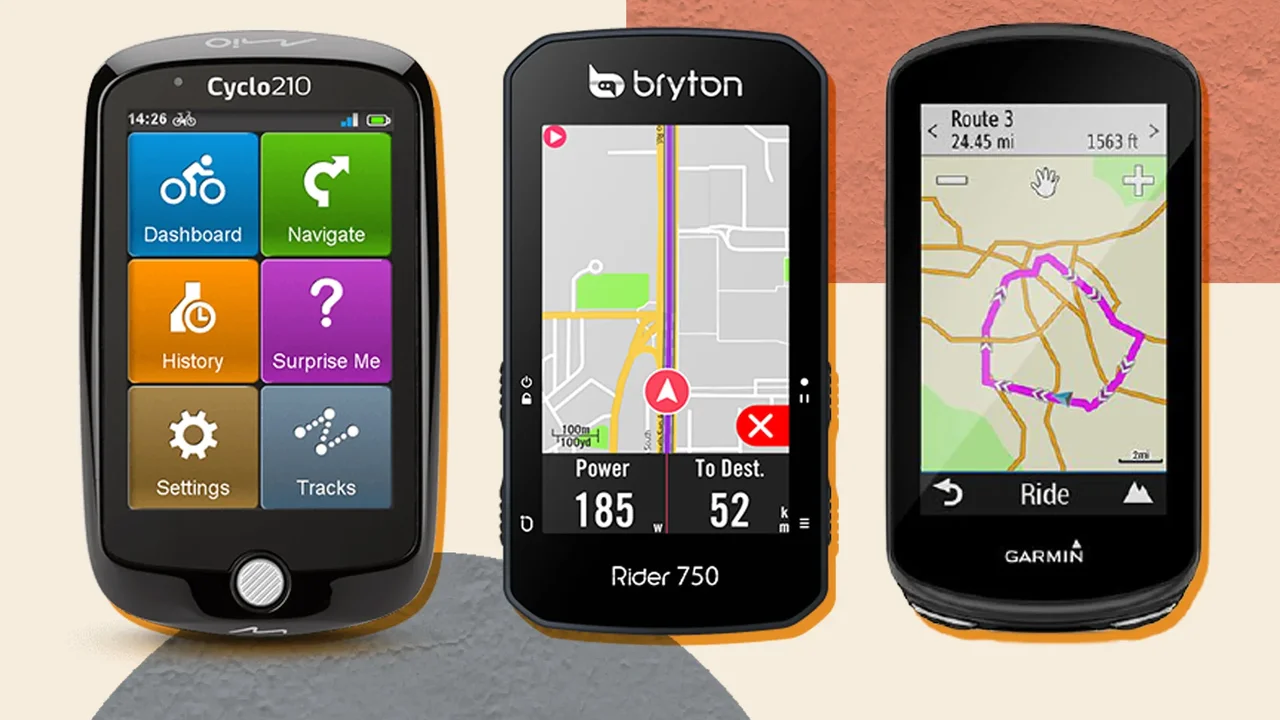
Bike Computer Navigation and Performance Garmin Edge vs Wahoo Elemnt Bolt
A bike computer tracks your speed, distance, and other metrics.
- Garmin Edge 530: A feature-rich bike computer with GPS, navigation, and performance tracking. Price: $300-$350.
- Wahoo Elemnt Bolt: A user-friendly bike computer with GPS, navigation, and smartphone integration. Price: $250-$300.
- Comparison: The Garmin Edge 530 offers more advanced features, while the Wahoo Elemnt Bolt is easier to use.
- Usage Scenario: Both bike computers are suitable for road cycling. The Garmin Edge 530 is a better choice for serious cyclists who want advanced data analysis.
Repair Kit Be Prepared Topeak Survival Tool vs Crankbrothers Multi-17
A repair kit is essential for fixing flats and making minor repairs on the road.
- Topeak Survival Tool Box: Comprehensive multi-tool with a wide range of tools. Price: $50-$60.
- Crankbrothers Multi-17 Tool: Compact and lightweight multi-tool with essential tools. Price: $30-$40.
- Comparison: The Topeak Survival Tool Box offers a more comprehensive set of tools, while the Crankbrothers Multi-17 Tool is more compact and lightweight.
- Usage Scenario: Both multi-tools are suitable for road cycling. The Topeak Survival Tool Box is a better choice for longer rides and more challenging terrain.
Tips for a Safe and Enjoyable Ride Pacific Coast Highway Safety Tips
Safety should always be a top priority when cycling on the PCH.
- Be Visible: Wear bright clothing and use lights, especially in low-light conditions.
- Obey Traffic Laws: Follow all traffic laws and signals.
- Be Aware of Traffic: The PCH can be busy, so be aware of cars and trucks.
- Stay Hydrated: Drink plenty of water, especially on hot days.
- Take Breaks: Stop frequently to rest and enjoy the scenery.
- Check the Weather: Be aware of weather conditions and avoid cycling in severe weather.
Alternative Routes and Side Trips Exploring Beyond the Highway
While the PCH is the main attraction, consider exploring some alternative routes and side trips.
- 17-Mile Drive: A scenic loop through Pebble Beach with stunning views of the coastline. (Note: There is a fee for cyclists.)
- Big Sur Coast Highway: A challenging but rewarding route with dramatic cliffs and redwood forests.
- Carmel Valley Road: A quieter and more scenic alternative to the PCH.
Enjoying the Local Culture and Cuisine West Coast Food and Culture
Take advantage of the opportunity to experience the local culture and cuisine along the PCH.
- Monterey: Visit the Monterey Bay Aquarium and Fisherman's Wharf.
- Carmel-by-the-Sea: Explore the art galleries and boutiques.
- Big Sur: Enjoy hiking and camping in the redwood forests.
- San Simeon: Tour the Hearst Castle.
- Cambria: Visit the art galleries and antique shops.
- Morro Bay: Enjoy fresh seafood and explore the harbor.
- Santa Barbara: Visit the Spanish colonial architecture and relax on the beach.
Cycling the Pacific Coast Highway is an unforgettable experience. With careful planning, the right gear, and a sense of adventure, you can create lasting memories on this iconic route. Enjoy the ride!
:max_bytes(150000):strip_icc()/277019-baked-pork-chops-with-cream-of-mushroom-soup-DDMFS-beauty-4x3-BG-7505-5762b731cf30447d9cbbbbbf387beafa.jpg)